数据库建表语句 sql文件在resources文件目录下。
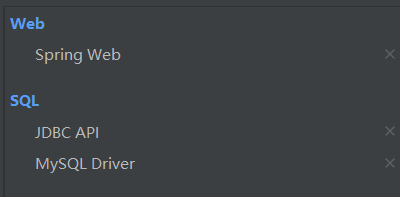
创建项目,导入依赖 添加以下启动器:
1 2 3 4 5 6 7 8 9 10 11 12 13 14 15 16 17 18 19 20 21 <dependency > <groupId > log4j</groupId > <artifactId > log4j</artifactId > <version > 1.2.17</version > </dependency > <dependency > <groupId > com.alibaba</groupId > <artifactId > druid</artifactId > <version > 1.1.21</version > </dependency > <dependency > <groupId > mysql</groupId > <artifactId > mysql-connector-java</artifactId > <scope > runtime</scope > </dependency > <dependency > <groupId > org.projectlombok</groupId > <artifactId > lombok</artifactId > <optional > true</optional > </dependency >
编写application.yml文件 1 2 3 4 5 6 7 8 9 10 11 12 13 14 15 16 17 18 19 20 21 22 23 24 25 26 27 28 29 30 31 32 33 34 35 36 37 spring: datasource: username: root password: root url: jdbc:mysql://localhost:3306/oldou?serverTimezone=UTC&useUnicode=true&characterEncoding=utf-8 driver-class-name: com.mysql.cj.jdbc.Driver type: com.alibaba.druid.pool.DruidDataSource initialSize: 5 minIdle: 5 maxActive: 20 maxWait: 60000 timeBetweenEvictionRunsMillis: 60000 minEvictableIdleTimeMillis: 300000 validationQuery: SELECT 1 FROM DUAL testWhileIdle: true testOnBorrow: false testOnReturn: false poolPreparedStatements: true max-open-prepared-statements: 20 max-pool-prepared-statement-per-connection-size: 20 filters: stat,wall,log4j maxPoolPreparedStatementPerConnectionSize: 20 useGlobalDataSourceStat: true connectionProperties: druid.stat.mergeSql=true;druid.stat.slowSqlMillis=500
书写DAO层代码 新建一个com.oldou.dao.UserDao
1 2 3 4 5 6 7 8 9 10 11 12 13 14 15 16 17 18 19 20 21 22 23 24 25 26 27 28 29 30 31 32 33 34 35 36 37 38 39 40 41 42 43 44 45 46 47 48 49 50 51 52 53 54 55 @Repository public class UserDao @Autowired private JdbcTemplate jdbcTemplate; public void save (User user) String sql = "insert into user (id,name,pwd) values(?,?,?)" ; jdbcTemplate.update(sql,user.getId(),user.getName(),user.getPwd()); } public void updateUser (User user) String sql = "update user set name=?,pwd=? where id=?" ; jdbcTemplate.update(sql,user.getName(),user.getPwd(),user.getId()); } public void delete (int id) String sql = "delete from user where id = ?" ; jdbcTemplate.update(sql,id); } public List<Map<String, Object>> QueryAll(){ String sql = "select * from user" ; return jdbcTemplate.queryForList(sql); } public User QueryUserByID (int id) String sql = "select * from user where id = ?" ; return jdbcTemplate.queryForObject(sql, new RowMapper<User>() { @Override public User mapRow (ResultSet rs, int rowNum) throws SQLException User user = new User(); user.setId(rs.getInt("id" )); user.setName(rs.getString("name" )); user.setPwd(rs.getString("pwd" )); return user; } },id); } }
编写业务层代码 新建一个com.oldou.service.Uservice接口
1 2 3 4 5 6 7 8 9 10 11 12 13 14 15 16 17 18 19 20 21 22 23 24 25 26 27 public interface UserService public void save (User user) public void delete (int id) public List<Map<String, Object>> QueryAll(); public User QueryUserByID (int id) public void updateUser (User user) }
com.oldou.service.impl.UserServiceImpl实现类
1 2 3 4 5 6 7 8 9 10 11 12 13 14 15 16 17 18 19 20 21 22 23 24 25 26 27 28 29 30 @Service public class UserServiceImpl implements UserService @Autowired private UserDao userDao; @Override public void save (User user) this .userDao.save(user); } @Override public void delete (int id) this .userDao.delete(id); } @Override public List<Map<String, Object>> QueryAll() { return this .userDao.QueryAll(); } @Override public User QueryUserByID (int id) return this .userDao.QueryUserByID(id); } @Override public void updateUser (User user) this .userDao.updateUser(user); } }
编写Controller层 1 2 3 4 5 6 7 8 9 10 11 12 13 14 15 16 17 18 19 20 21 22 23 24 25 26 27 28 29 30 31 32 33 34 35 36 37 38 39 @RestController public class UserController @Autowired private UserService userService; @GetMapping("/list") public List<Map<String, Object>> queryAllUser(){ List<Map<String, Object>> list = userService.QueryAll(); return list; } @GetMapping("/query/{id}") public User queryUserByID (@PathVariable("id") int id) User user = userService.QueryUserByID(id); return user; } @RequestMapping("/delete/{id}") public String deleteUser (@PathVariable("id") int id) userService.delete(id); return "删除用户成功!!" ; } @RequestMapping("/add") public String addUser () userService.save(new User(6 ,"ppp" ,"1232" )); return "增加用户成功" ; } @RequestMapping("/update/{id}") public String updateUser (@PathVariable("id") int id) userService.updateUser(new User(id,"ppp" ,"999" )); return "更新用户成功" ; } }
测试 启动项目,访问
拓展 配置Druid数据源监控 Druid 数据源具有监控的功能,并提供了一个 web 界面方便用户查看,类似安装 路由器 时,人家也提供了一个默认的 web 页面。
所以第一步需要设置 Druid 的后台管理页面,比如 登录账号、密码 等;配置后台管理;
新建一个com.oldou.config.DuridConfig
1 2 3 4 5 6 7 8 9 10 11 12 13 14 15 16 17 18 19 20 21 22 23 24 25 26 27 28 29 30 31 32 33 34 35 36 37 38 39 40 41 42 43 44 45 46 47 48 49 50 51 52 53 54 55 56 57 58 59 60 61 62 63 64 65 66 67 68 69 70 71 72 73 74 75 package com.oldou.config;import com.alibaba.druid.pool.DruidDataSource;import com.alibaba.druid.support.http.StatViewServlet;import com.alibaba.druid.support.http.WebStatFilter;import org.springframework.boot.context.properties.ConfigurationProperties;import org.springframework.boot.web.servlet.FilterRegistrationBean;import org.springframework.boot.web.servlet.ServletRegistrationBean;import org.springframework.context.annotation.Bean;import org.springframework.context.annotation.Configuration;import javax.sql.DataSource;import java.util.HashMap;import java.util.Map;@Configuration public class DuridConfig @ConfigurationProperties(prefix = "spring.datasource") @Bean public DataSource druidDataSource () return new DruidDataSource(); } @Bean public ServletRegistrationBean statViewServlet () ServletRegistrationBean<StatViewServlet> bean = new ServletRegistrationBean<>(new StatViewServlet(), "/druid/*" ); Map<String, String> initParameters = new HashMap<>(); initParameters.put("loginUsername" ,"admin" ); initParameters.put("loginPassword" ,"123456" ); initParameters.put("allow" ,"" ); bean.setInitParameters(initParameters); return bean; } @Bean public FilterRegistrationBean webStatFilter () FilterRegistrationBean bean = new FilterRegistrationBean(); bean.setFilter(new WebStatFilter()); Map<String, String> initParameters = new HashMap<>(); initParameters.put("exclusions" ,"*.js,*.css,/druid/*" ); bean.setInitParameters(initParameters); return bean; } }
访问:http://localhost:8080/druid/login.html